Monday, October 29, 2012

Healthy Halloween Party Foods

Even though Halloween is not one of my favorite holidays, I enjoy the parties and seeing people (especially kids) dressed up.  We have been enjoying several Halloween parties this year and I'm constantly thinking of healthy and gluten-free foods to take that actually taste good and kids will eat.  This year I found three and added a little Halloween creepiness to some of them. 

I made two appetizers, one fruit and one vegetable.  I also made a dessert.  Here are my gluten-free Halloween party foods.  The great thing about these are you can make these foods for any party, just take away some of the extra creepiness.  Click on the links below for the recipes!  Happy Halloween!!

Spooky Apple Teeth


Creepy Spinach and Artichoke Finger Dip 

Primal Pumpkin Almond Butter Brownies


Spooky Apple Teeth

Spooky Apple Teeth
I think I got this idea from Pintrest.  I'm always thinking of healthy things to take to parties. I made these for a Halloween party and the kids loved them. These are easy to make.  

I used organic apples, organic apple butter, and different nuts for the teeth.  I used almonds, walnuts, and pistachios.  Pistachios seemed to be the easiest.  You could also use almond butter or peanut butter for the filling.

Here's my step-by-step guide to making these yummy and healthy treats.

Start by cutting the apples like this.


Then cut the mouth.


Once you have them all cut, rub a sliced lemon over the whole apple so it doesn't darken.


Spread some apple button in the "mouth" of the apples.


Add the nuts for the teeth and you're done!


Creepy Spinach and Artichoke Finger Dip

Creepy Spinach and Artichoke Finger Dip
I made this delicious dip for a Halloween party.  This is the Vitamix's Spinach and Artichoke Dip and came from here. As I was trying to think of ways to make it creepier I added some sliced carrots with almond slivers on top for finger nails.  This dip is yummy!  I plan on making this again for Christmas but without the fingers.

If you don't have a Vitamix, just use your blender or food processor.  Blend the first step tell pretty smooth and then pulse the second step.

Spinach and Artichoke Dip

Ingredients
  • 1/2 cup (120 g) light mayonnaise
  • 1/2 cup (120 g) light sour cream
  • 1 slice lemon, peeled, seeded
  • 1 (10-ounce) package of frozen spinach, thawed, drained
  • 1/8 teaspoon salt
  • 1/8 teaspoon ground black pepper
  • 1 garlic clove, peeled
  • 1/4 cup (25 g) grated Parmesan cheese
  • 1/2 cup (85 g) artichokes, canned and drained or frozen and thawed
Directions
  1. Preheat oven to 350˚F (180˚C).
  2. Place all ingredients, except artichoke hearts, into the Vitamix container in the order listed and secure lid.
  3. Select Variable 1.
  4. Turn machine on and slowly increase speed to Variable 4.
  5. Blend for 15 seconds. Remove the lid plug.
  6. Add artichokes through the lid plug opening.
  7. Blend for an additional 5 seconds.
  8. Pour into an oven-safe dish and bake uncovered for 20-25 minutes or until bubbly. Serve with crackers, pita bread, veggies, or pumpernickel bread.

Primal Pumpkin Almond Butter Brownies

Pumpkin Almond Butter Brownies
These are really good!  I got this recipe from This Primal Life. I made these for a Halloween party and when Blue Rock asked for dessert I gave him one of these brownies. They are really prefect for any party and are a nice healthier alternative to some of the real sugary desserts.  They are also gluten free! 

Primal Pumpkin Almond Butter Brownies

 
Ingredients:
1 cup almond butter
¾ cup mashed pumpkin or other squash, canned or steamed
1 egg
1/3 cup honey
1 tsp baking soda
Combine all of the ingredients in a bowl. Mix well. Pour into a greased 8 x 8 in pan. Bake at 350 degrees for 25 minutes or until a toothpick inserted comes out clean. Serves 8. You can add chocolate if you want. I did to the top of half the batch and those were even better! The consistency was really good. If you want to use less honey I read you can use as little as 2 Tbs. I just estimated 1/3 cup and poured it in.

Thursday, October 25, 2012

City Pumpkin Patch

October is the time to visit a pumpkin patch.  Sadly, it hardly feels like Fall in Texas since we've still been having 80 degree weather.  But that doesn't stop me from wanting to start and continue family traditions. Since we live in the city we would have to drive a ways to visit a real pumpkin patch. Thanks to one of my friends, I found out there is a pumpkin patch in town that is only about 20 minutes from our house.

I have been wanting to take Blue Rock to a pumpkin patch all year.  We went several times in Germany to a farm and it was always fun. 
The pumpkin patch in the city is actually at a stone yard.  They had a lot of pumpkins and a big bounce house with a big slide.  It only cost $1 per person to get in, you can take as many pictures as you want, and the pumpkins are pretty reasonably priced.  The entrance fee is donated to the local food bank.  Blue Rock enjoyed finding the perfect pumpkin and playing on the big slide on the bounce house.  I had fun on it too.  Here are a few pictures from our city pumpkin patch.  I think we'll plan on going there next year too.


There were several large pumpkins, some even bigger than this


Climbing up to the slide
Going down the slide
We spent about 45 minutes there having fun


Green Cauliflower Macaroni and Cheese

Green Cauliflower Macaroni and Cheese
In my quest for eating more real foods, I've been trying to think of recipes that are colorful, tasty, interesting looking, and healthy.  Since it's almost Halloween, I decided to make something would interest my 3-year old.  My family does not eat a lot of cauliflower nor do we eat a lot of Marconi and Cheese.  In fact, Blue Rock does not like the typical Macaroni and Cheese dinners from a box.  But I thought, maybe if I'm creative, he'll eat my green Cauliflower Macaroni and Cheese.  I first got the idea from Healthy Recipes From the White House to You by Michelle Obama.  However, I changed her cauliflower macaroni and cheese quite a bit.  For example,my green macaroni and cheese does not use milk and has kale and walnuts, and most importantly is green!  This is a great vegetarian recipe.  My family loved it and I hope yours does too!

Green Macaroni and Cheese 

Ingredients
8oz-10oz whole grain pasta (if gluten free use rice pasta)
1/2 cups walnuts (divide into 1/4 cups each)
2.5 cups shredded cheddar cheese, I did a mixture of sharp and mild (or a mixture of your favorite melting cheeses), divided, save 1/2 cup of cheese for the top
1 small head of cauliflower, cut into florets
1 cup fresh kale
Salt and pepper to taste
1 tablespoon melted butter
1/2 cup breadcrumbs (I made mine with one piece of toasted whole grain bread and 1/4 cup walnuts in a food processor). If avoiding gluten, use gluten free crackers instead of bread.

Directions
  1. Preheat the oven to 350º. Bring water to a boil and cook the pasta until al dente, drain.
  2. Steam the cauliflower until soft, about 10 minutes. Transfer to a blender along with a few tablespoons of the steaming liquid. Add kale.  Puree the cauliflower and kale until smooth.  Add butter and blend.
  3. Add 1 cup of water and 1/4 cup of walnuts to the blender and blend with the cauliflower and kale puree.
  4. In a medium size casserole dish, combine the pasta and hot cauliflower puree. Add the puree mixture and cheeses. Season with salt and pepper to taste.
  5. In a food processor, add 1/4 cup of walnuts.  Pulse until fine.  If making your own breadcrumbs, add to the food processor.  If not, mix the walnuts and breadcrumbs, should look kind of like sand. Sprinkle across the top of the pasta mixture.  Top with about 1/2 cup of cheese. Place the dish in the oven for 10-15 minutes until the top is crispy and the sauce is bubbling.
Serves 4 to 6.

Yum, looks like slime

Grated cheese, sharp and mild cheddar cheese

Mixed the cheese sauce with the pasta

Top with walnut breadcrumbs

Add a some mild cheddar cheese on top

It's done!

Time to eat!


Tuesday, October 23, 2012

Gluten Free Oatmeal Cookies

GF Oatmeal Cookies
It seems like when the temperature drops I want to stay in my kitchen and bake.  I'm on my way to no longer eating gluten.  Therefore, I've been trying to find good recipes that are gluten free.  I adapted this recipe from the back of the Trader Joe's gluten free oats.  It makes about 4 dozen cookies, so there is plenty to share!

Gluten Free Oatmeal Cookies

Ingredients:

1/4 cup butter, softened
3/4 cup sugar
3/4 cups brown sugar
2 eggs
1 teaspoon vanilla
1¼ teaspoon baking soda

1/4 teaspoon salt

1 cup peanut butter
3 cups rolled oats, I used 2 cups (because that's all I had) and they still turned out great (gluten free)
6 oz chocolate chips
1/2 cup chopped walnuts (or pecans, like the original recipe calls for)

Directions:
  1. Preheat oven to 350.
  2. With an electric mixer, cream together the butter and sugars in the bowl until fluffy.
  3. Add the eggs, vanilla, baking soda, and salt. Mix. Add peanut butter and mix.
  4. Add the oats, chocolate chips and walnuts. Mix slowly until combined.
  5. Scoop about a teaspoon of dough onto a greased or parchment-covered cookie sheet.
  6. Bake 10-12 minutes until lightly brown at edges. Remove and let cool on wire rack.
My husband and son loved these cookies!  Nobody would ever second guess they were gluten free.

Friday, October 12, 2012

Pre-Writing Activities that do not involve Crayons

It's been a while since I've posted some activities I do with my 3-year old.  Blue Rock is not really into coloring with crayons like some kids are.  This wouldn't matter too much except that I like him to practice holding a pencil the correct way and build his fingers for future writing.  Thankfully, there are a number of activities that don't involve crayons to achieve this. Blue Rock already has great hand-eye coordination and fine motor skills.  There are several other mediums he enjoys such as painting and drawing with sidewalk chalk which strengthen his hands and fingers. He also has always loved molding things with play-doh which is another great pre-writing skill.

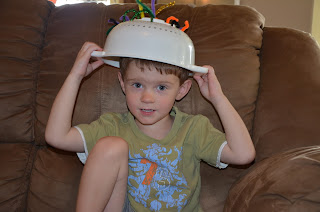
Here are a few activities we've been doing lately.  The first activity includes a colander and pipe cleaners.  I had him put the pipe cleaners in different holes of the colander.  He did great and sort of liked this activity especially after he decided he could make a hat with it.  We've done this several days this week.  I wish I would have thought of this a year ago because I think very young children would enjoy this as well.


The next activity is beading.  I had him sort the beads by color and place them on the pipe cleaners.  These are just the regular Melissa and Doug beads.I've been very impressed with how well he is able to bead things.  This is something we just started doing and he seemed to naturally know what to do.


I bought this awesome Turtle when he was almost 2 to take with us to church and work on his fine motor skills.  He still likes playing with it from time to time.  He mastered matching the magnetic bead in the correct color slot when he was about 2.5.  Now he will go back and forth between putting them all in the matching slot and trying to get all the beads in one slot.


This last activity he does on his own.  He's taking a part a small flash light.  He loves taking apart things and trying to put them back together.  This is also a fun fine motor, pre-writing activity. 

Related Posts Plugin for WordPress, Blogger...